Go to https://pennacloud-deploy.beta-pennadigital.co.uk/. This will show you a list of all available sites on the server.
To create a new site click on the Create link in the top navigation.
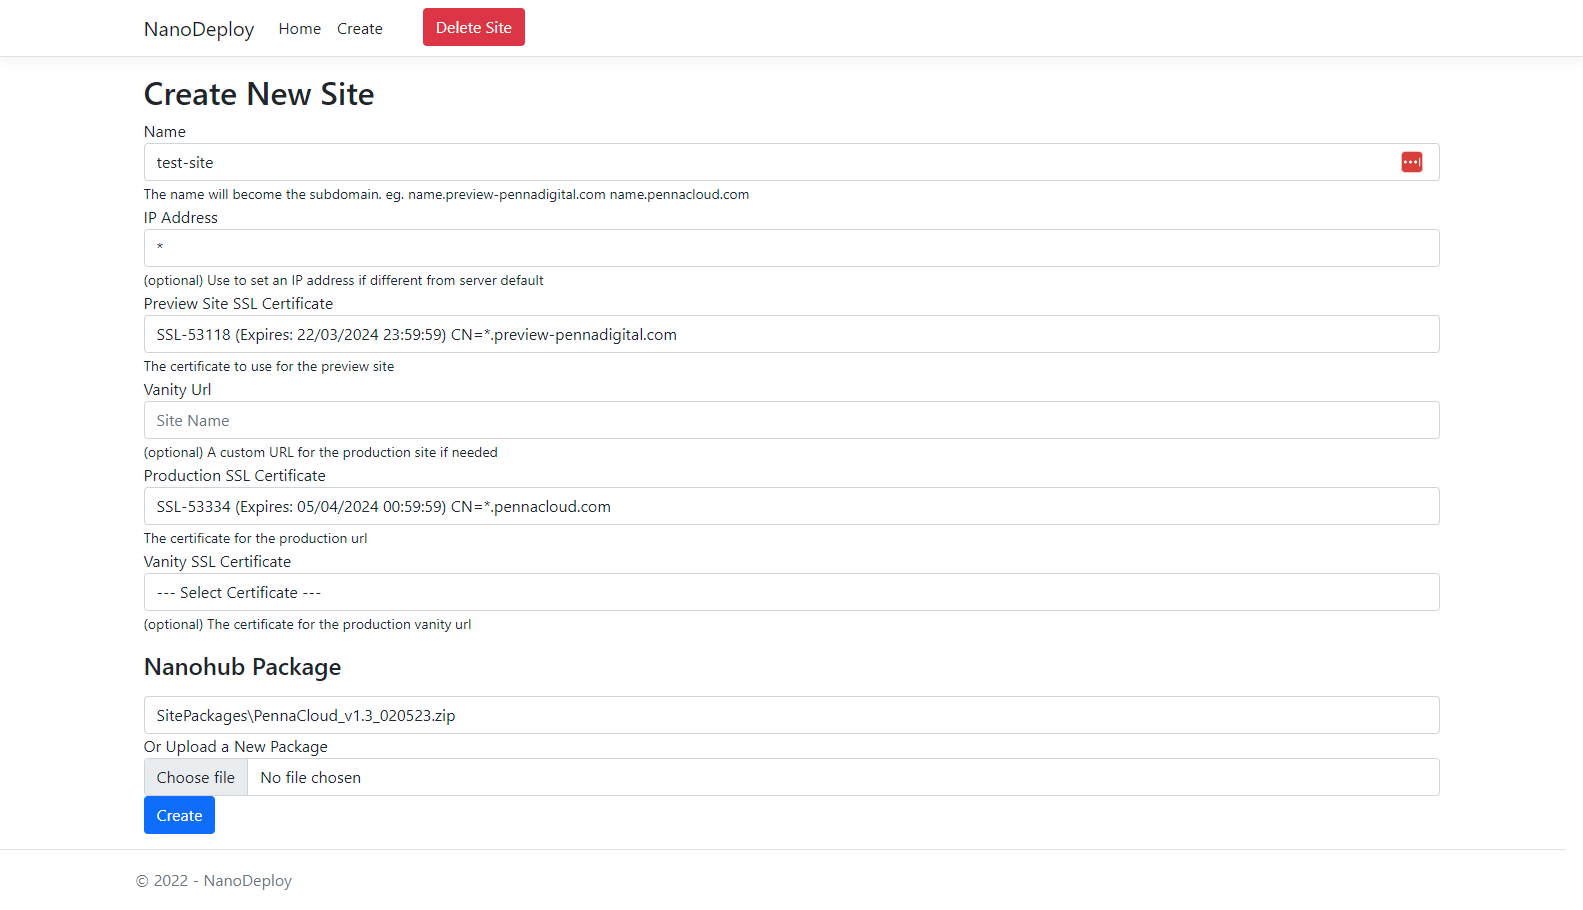
Name
From here enter the site name, e.g. test-v1
The name will become the subdomain. eg. test-v1.preview-pennadigital.com and test-v1.pennacloud.com
IP Address
(optional) Use to set an IP address if different from server defaults
Preview Site SSL Certificate
The certificate to use for the preview site. You can select which SSL you would like to use from the dropdown list but the preview SSL is selected automatically.
Vanity URL
(optional) A custom URL for the production site if needed
Production SSL Certificate
The certificate for the production URL. You can select which SSL you would like to use from the dropdown list but the production SSL is selected automatically.
Vanity SSL Certificate
(optional) The certificate for the production vanity URL
Once the fields above have been completed you select which package you will use. In the "Penna Cloud Packages" section you will see a dropdown with options in there. The one to use is the latest version of PennaCloud_vx.x_DATE
Or Upload a New Package.
Once this is selected click the Create button at the bottom of this section.
Initial Setup
When the site has been created you will be taken back to the list of sites. You should see the new site in the list but if you can't you can use CTRL + F you can search for the site name to check it has created it correctly.
You will see two versions of the site you've just created:
SITENAME.pennacloud.com
SITENAME.preview-pennadigital.com
The pennacloud link will be the live version of your site and the preview-pennadigital.com link will be the "staging" version of your site - this is the one you will work on and add content until it is ready to be pushed to the live site.
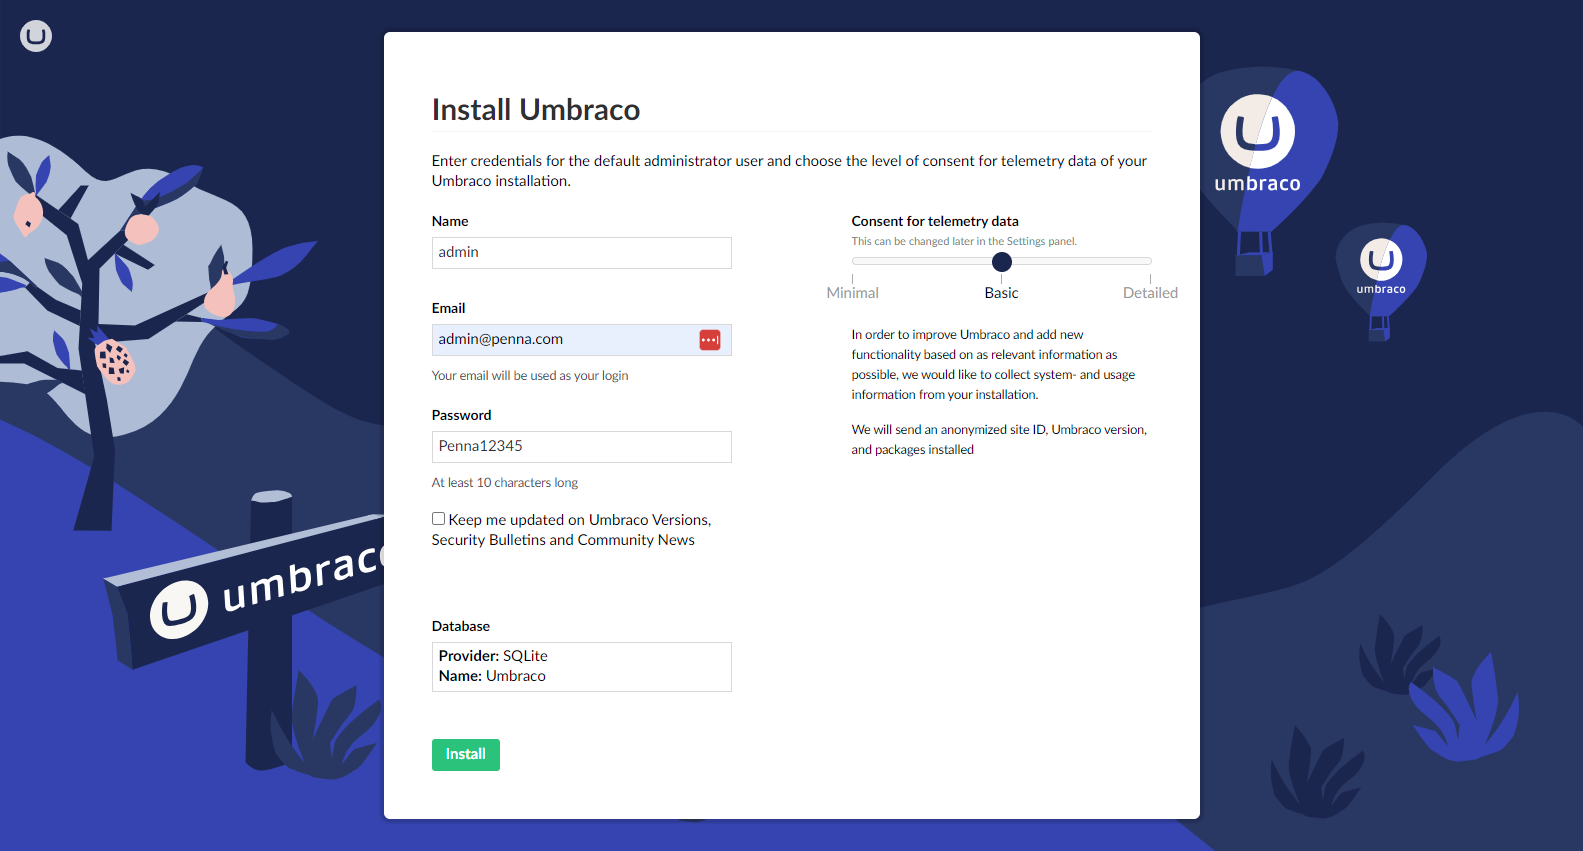
Now your site is created its time to run the initial set up. If you type the preview URL into a browser address bar it will start the installation process.
Once the process starts you need to create an admin user:
Set the name as admin
Set the email as admin@penna.com
Set the password as Penna12345
The installation process will now run and then the site will open up into the Umbraco CMS.
Template Options
From here there are a few options for the type of template you want to use, the options are:
Tier 1 template
Tier 2 template
Maintenance template
Or the Standard template
The maintenance template should be added to the live version of your site so there is temporary construction page to let any users know it is being built whilst working on the preview site.
To add a template you will need to click Settings and then on the Usync publisher tab on the left.
From here you should see "Add new server" button. If you click on this it will open the side panel and give you the option to add the URL for one of the templates above
Note: This next step will just be a temporary step for initial setup of the website.
Enter Name as Temp
Enter URL as one of the following:
Maintenance - https://maintenance.pennacloud.com/umbraco
Tier 1 - https://pennacloud-tier-1-template.pennacloud.com/umbraco
Tier 2 - https://pennacloud-tier-2-template.pennacloud.com/umbraco
Once the template URL has been added, you just need to select "Pull Settings" and select all the settings and content / media.
Standard Template
If you don't want to use any of the predefined templates you can use the standard template, this has a slightly different set up.
You will need to click Settings and then on the Usync tab on the left.
From here you just need to click "import everything" and wait for that to complete.
Once it is completed if you click on Content and either right click on content and select "Reload" or you can refresh your browser you should see some pages appear under Home. Your setup is now complete and you can start building the site.
Preview to live
To set up a link between your preview site and the live site you need to run the installation process on the live site in the same way you did for the preview site. And again create an admin user:
Set the name as admin
Set the email as admin@penna.com
Set the password as Penna12345
Once this is done go back to the preview site and click Settings and then in the sidebar you will see uSync publisher.
Here you add a new server and put in the URL of the live site, followed by /umbraco. E.g. test-v1.pennacloud.com/umbraco
You will then be asked to choose a template for this. You will want to select Content & Media & Settings. So you can move the whole site to live.
Once this is done you will be able to "Push" and "Pull" the content between the preview and live site.
To push from preview to live, click Push settings and then select everything including "Content" & "Media". Then select "Push to server". This process will then run. Once it is complete you can visit the live URL and see the content and settings from the preview site.
Live to preview
You may also need to pull the latest content / settings from the live site back to the preview site to update content blocks etc.
To do this you use the uSync publisher server you set up above and then select "Pull Settings" instead of "Push". It works in a similar way to above.